You might be wondering how clean boot helps? When your PC is in a clean boot state, it utilizes pre-selected drivers and programs. As a result, it becomes easier for the users to figure out if there’s a problem with the system file or additional program.
How to Clean Boot In Windows 11
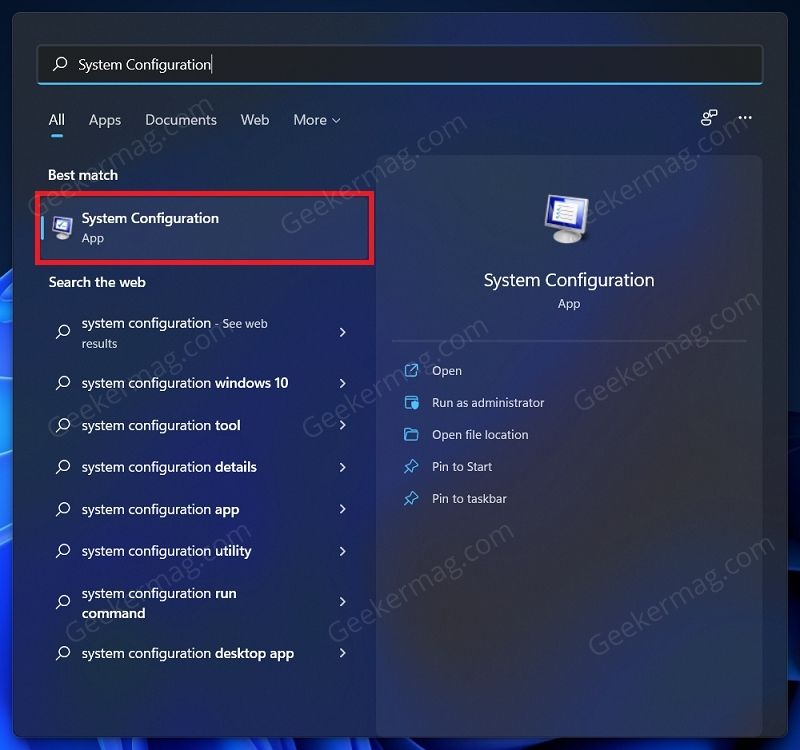
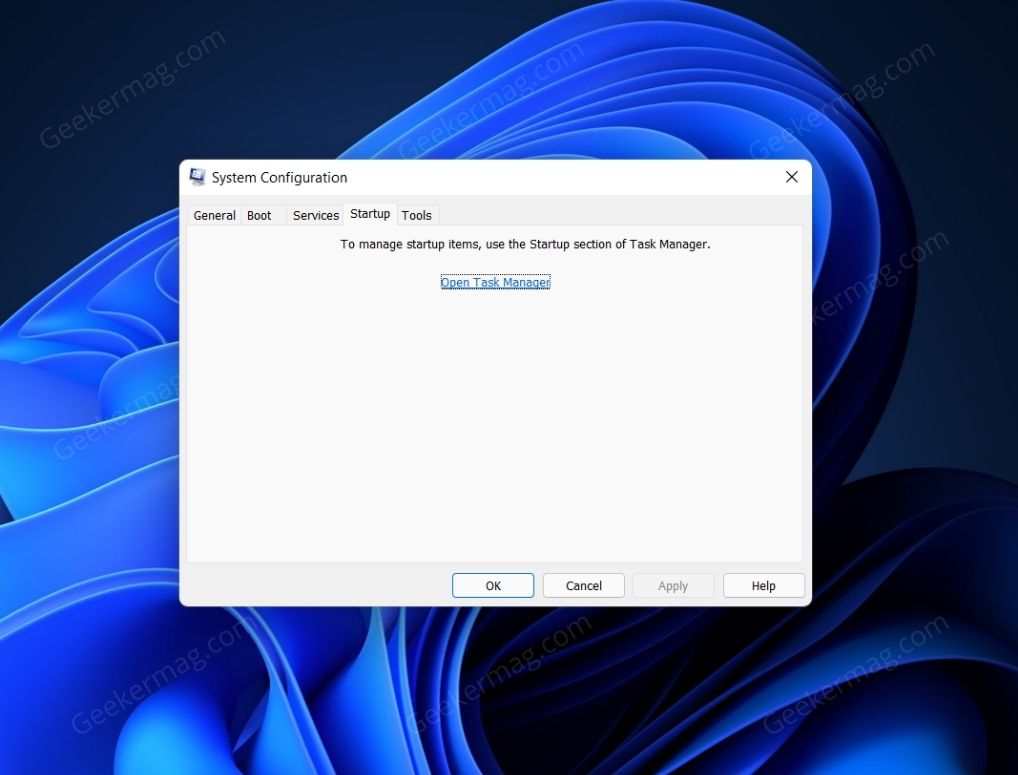
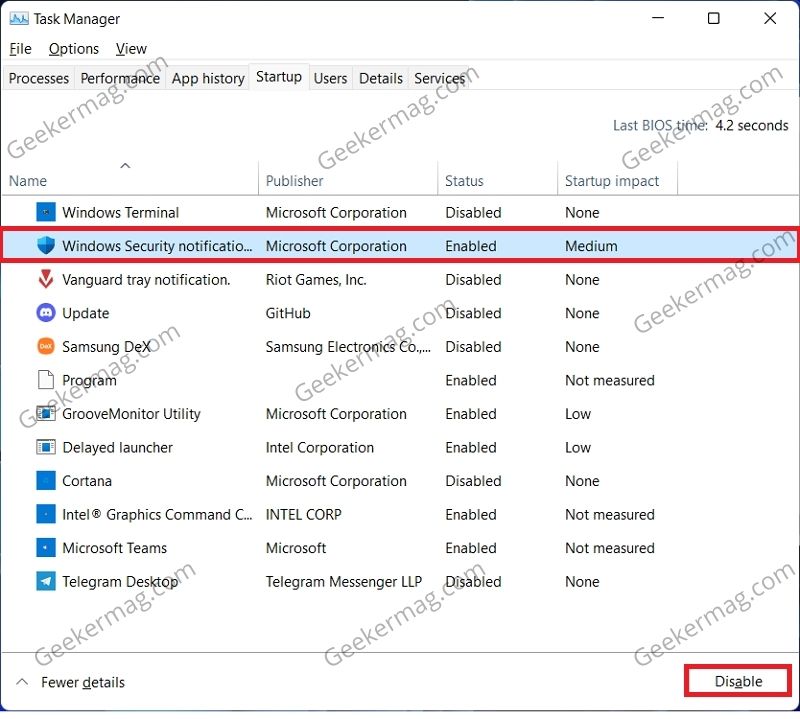
In case, you’ve recently upgraded to Windows 11 and want to know how you can clean boot your Windows 11 PC, then in this blog post, we will share step-by-step instructions on how to do that. Open the Start Menu by pressing the Windows key on your keyboard. In the search box, type System Configuration, when it appear in search results, click to open it. In the System Configuration window, switch to the Services tab. Here, check the checkbox saying Hide all Microsoft services (bottom left side). Now this will hide all the Microsoft services (because we want to keep Microsoft service keep running) and show you third-party service, click on Disable all button. Next, head to the Startup tab on the System Configuration app window, and then click on Open Task Manager. You will be redirected to the Startup tab in the Task Manager. Now select the apps with the status as enabled. Select them one by one, and then click on Disable to disable these apps. Once done, restart your PC, and this time your Windows 11 PC will boot in the clean boot state. In case, the issue still persists, then something else is triggering the issue. Better restart your Windows 11 PC in Safe mode or use prefer a method to troubleshoot the issue. On the other hand, if your system is working fine in a clean boot state, then we’re moving in the right direction. Now you need to enable apps one by one to catch problematic apps. For that, launch System configuration > Services. Here, enable the service one by one and then click Apply/OK and restart. You need to repeat the steps until you find the problematic program. After you are done with troubleshooting your PC, you can re-enable the services and the apps that you have disabled.


