You can also grab the Offline installer of Chrome browser and install it on your computer like any other program. But in both methods, you have to take the help of another browser to grab a web installer or setup file. Fortunately, there’s a quick workaround using which you can easily install a Chrome browser on your computer without taking the help of another browser using a simple command line.
Install Chrome in Windows 10 using PowerShell
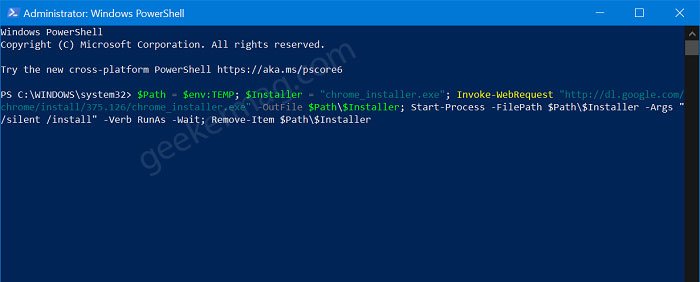
In this workaround, we’re going to use Windows PowerShell app which is available in Windows 10 out of the box. Also, make sure you’re connected to internet connection. Are you excited to know the steps? Here’s what you need to do: Launch Windows PowerShell in Windows 10. For that, right-click on the Start button and select “Windows PowerShell (Admin)“ When UAC dialog box appear, click Yes to continue. Next, you need to copy-paste following command in Windows PowerShell window: $Path = $env:TEMP; $Installer = “chrome_installer.exe”; Invoke-WebRequest “http://dl.google.com/chrome/install/375.126/chrome_installer.exe" -OutFile $Path$Installer; Start-Process -FilePath $Path$Installer -Args “/silent /install” -Verb RunAs -Wait; Remove-Item $Path$Installer and then hit Enter. Wait for few seconds and let the command complete its work. In few seconds. Chrome browser shortcut will appear on the desktop, confirm that installation process completed successfully. From the above discussed method, this method is by far the best and quick method to install Chrome browser on Windows 10. And guess what? You don’t have to take help of other browser. I hope you find this trick useful. If you know similar tricks, then feel free to share with us in the comments.